
How to convert HEIC to JPG
Save iPhone HEIC photos as JPG with light-view: several at once, at full size if you like.
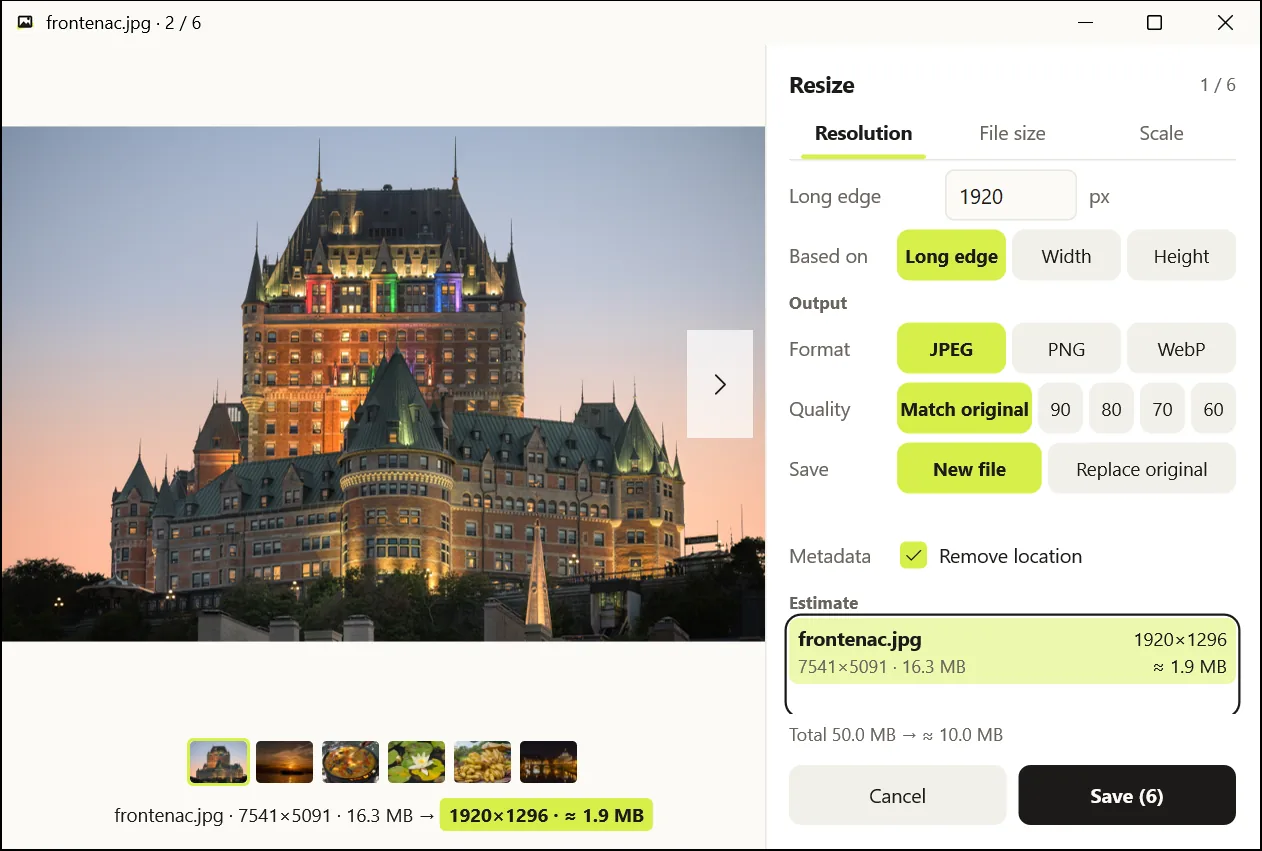
light-view's Resize screen saves HEIC and HEIF photos as JPEG, PNG or WebP. It leaves the originals alone and writes new files.
1. Open the Resize screen
- Installed copy: in Explorer, select one or more HEIC photos, right-click → Resize with light-view. On Windows 11 it is under Show more options.
- Portable copy: drop several photos on the light-view window and choose Resize, or right-click the photo you are viewing → Resize.
2. Pick the settings
- Size: to keep the original size, enter
100% on the Scale tab. For photos you will upload, the Resolution tab's default (1920 px on the long edge) is plenty. Photos are never enlarged. - Format: JPEG (the default).
- Quality: leave Match original (the default). Originals that are not JPEG, like HEIC, are saved at quality 90.
- Save: leave New file (the default).
The Estimate list shows each photo's size and file size before you save.
3. Save
Save writes name_small.jpg next to each original. If that name is taken, it uses name_small (2).jpg and so on. The HEIC originals are not deleted or changed.
What happens to the photo's details
The date taken, the camera and lens, and the exposure settings stay in the JPG. Location (GPS) is removed by default; to keep it, clear Remove location under Metadata. More in How to remove location data before sharing photos.